Friday, October 26, 2012

Shimelle's starting points

I'm sure by now everyone knows I'm in love with Shimelle's style, her cute voice, her nails, her dedication to scrapbooking and most importantly to me, her dedication to writing down the stories and like me writing a lot. Shimelle has taught me a lot. I am no longer scared of writing on my layouts. My writing isn't as neat or as arty as her BUT I've written down the stories and the memories will live on.

When Shimelle has her starting points on her blog I usually participate but very rarely do I add my linky to her page. If the truth be told I'm just slack. I find her starting points an inspiration. A jumping off point. I'm quickly able to get a page done whereas if I sat down and started to scrap I'd often not be able to start quickly. What's a starting point? It's just the starting layers of a layout, without the photos or any other items. you use the starting points to build your layout and add your embellishments. I love them.

This page was make using the scraps from a Scenic Route kit I have had for years. Most of these pieces I didn't even trim but just added them according to the design of the starting point. 


Here I stamped the June using Technique Tuesday stamp set Twenty Eleven. I like the subtle effect of tone on tone here. Each layer was inked in distress ink. I have only started using the coloured distress inks for edges. Usually it's just brown.


This layout, Nanny, is very special to me. I'm not very happy with the end result but I am happy with the story. I miss my Nanny and am so glad I had the opportunity in her later life to spend so much time with her when she didn't have many family members around her. 

I find these papers, ones with large designs/scenes, very difficult to work with. I just don't know what to do with them. How do you incorporate these designs into your pages? I find I buy them and then don't know how to use them. On this one I added extra strips around the sun using the same paper line.


 This is another special layout to me. It is about my sister and I growing up and how we have maintained our wonderful friendship even though we have had rough times in the relationship and even though we live on opposite sides of the world. It also mentions that I wish this kind of relationship for my daughters. 

This layout only uses 4 different patterned papers. All of the embellishments came in the same Scenic Route collection. 


I have had this layout completed for a very long time. The journaling hasn't been done though. It was such an important story. The story of how I snagged my husband. I didn't want to get it wrong.

Essentially this is only 2 pieces of patterned paper and a few stamps, stickers, chipboard sign and a tag. Very simple but also it is a masculine page so I didn't want to over do it. My darling husband still says there is too much on the layout.


I'm quite happy with this layout. Often I'm not good at mixing collections but I did manage ok here. This is a layout about my Mum starting this street performance group. 
It is another very simple design with the twine, string and washi tape adding most of the embellishment. I think it turned out well. 


Thanks Shimelle for the starting points. It really got me going. I appreciate it. What gets your mojo going? Do you use youtube videos, starting points, sketches, classes to get your mojo going?

Thursday, October 11, 2012

10 on the 10th Project Life tips


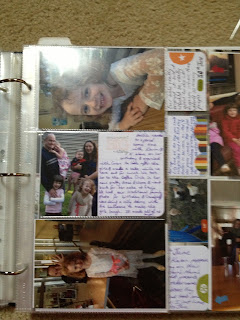
There seems to be a renewed interest in Project Life. Maybe it never waned, maybe the interest has peaked because of the new products. I am interested in the school years mini kits but can't seem to find any information about when they'll be released. For now I'm plodding along with my Project Life 2012 albums. Up until yesterday I was very behind. To be honest with you I'm not entirely caught up. I still have a few photos to print and a few dates to find out for photos but essentially everything is completed. 
I decided to include my top 10 hints for making this a do-able project.

Tips for Project Life

1. Be prepared. Be super prepared. Have an idea of what you want to achieve with this project then set your system up for that project. You might want to do a spread a month or just of special family events. You may go the weekly method like I have. Whatever system you decide on, set it up so it works for you. Set your photo organisation system and your journaling system up so it works for you. Be prepared with supplies if you are adding to the core kit or just use what comes out of the box but be prepared so it doesn't become a huge task. 

2. If you are going the monthly method you may want to stamp a few journaling cards with just the month and the year on them so when something important or memorable happens that month you can simply write on the card and set it aside until the end of the month. Last year I did 7 or more journaling cards a week so I pre-stamped my cards with the date of every day for a few months in advance so I just pick up the card at the end of the night and write on it. This year I haven't gone with that method and I feel my journaling has been let down by it a bit. I haven't kept up with my journaling and have often only journalled once the photos have been printed. Often my journaling doesn’t match the photo and I’m ok with that. I have written journaling cards with the meals we’ve eaten that day and the times certain events have occurred. Sometimes the photos say enough and I want to include other parts of our lives. What can you say about a cute kid? 
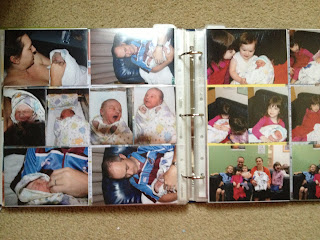
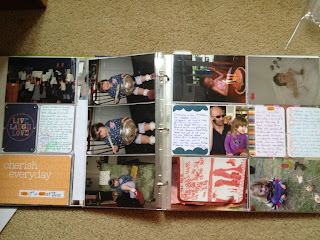
Here is an extra 2 pages I've inserted into a week. This was the week my son was born. Obviously a lot to celebrate that week. Lots of photos and memories to record which meant a lot more to be put into the album.
3. Be a little relaxed about the project. Its purpose is to record memories and be a simple alternative to traditional scrapbooking. Find strategies which make it less stressful. I’m also ok with not having a photo a day. In the past I have included journaling every day but some weeks there might be 4 photos from one day and I forget to take a photo for the next few days. So work out the system that works best for you. Work out if you are ok with journaling that doesn’t match the photos. Work out if you will stick to a photo a day or whether my approach will be something you’ll be able to live with.


4. I did just mention journaling but I wanted to point out my experience from 2010 when I made my own kit. The kit was made to type the journaling and print it on the computer. This didn’t really work for me. Although I am quite skilled at printing my journaling onto tags and the like for my scrapbooking pages I didn’t end up printing out my journaling until I’d had heaps of journaling cards completed. I also found that at the end of the day the last thing I wanted to do was sit down in front of the computer and write my snippet of journaling. Most of you know I don’t like my hand writing so I was a little nervous about having a book full of my handwriting for all to see.  Now I'm ok with that. I don't mind people seeing my spelling mistakes and my horrible handwriting. I just want the memories recorded. So if you know you can sit down at the computer to do the journaling go that route but if you think that having a stack of cards handy will mean you are more likely to record the story use your handwriting. I find it easier to dedicate 5 mins a day to writing my journaling directly onto the cards than 15-20 mins at the end of the week. However you do it work on a system that will work for you. Have them in your handbag or in your diary so they are on hand.
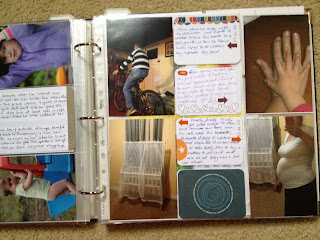
Here there is a lot to say. Lots of writing. Almost a card for every photo. 


Another busy week with added inserts.


5. Download regularly. Last year my system was to download the photos every Friday. They were then labelled and stored appropriately. This year I have not allocated time every Friday to do this and have fallen behind in photo downloads. This is something you want to avoid. Keep your photos up-to-date otherwise sorting and labeling them just becomes too big a task.

6. Storing your photos. Find a system that works for you. I label them with date (year, month, date) and title and store them in the month folder and copy the photos I want for P/L into the  P/L folder which then has sub-folders with the month. So my P/L photos are stored in 2 places; in the general photos section under year then month and also in the P/L folder. I do it like this so I don’t have to search for the photo I want amongst all the other photos taken that month. I don’t print at home because I can’t justify the expense of a home printer which is of good enough quality when I can get prints from Harvey Normans for 9c. 
This is a list of photos I need to print so I'll just go to the relevant folder in the Project Life album and print them out. Very easy to find. 

7. Print photos regularly, at least once a month. The longer you leave it the bigger the task becomes. I find that by storing them in the correct folders makes it easy for me to know where I am up to. My aim would be to print every week but somehow life gets in the way and I can't get to the shop to print. 

8. Keep it simple. I very rarely add other embellishments. A bit of washi tape here, a jewel there, and only a very few times special letter titles. I mainly use the kit by Becky Higgins.

This is a rare example of adding title letter stickers.
9. Cut page protectors to suit your purpose or don't be afraid if you have to stick a portrait shot in the landscape pocket. Remember it's a memory album. Will your kids or great nieces care in 30 years time? Will you? Use what page protectors you have to make it work. I frequently use American Crafts 6x12 divided page protectors to add extra photos and I've even cut a few.

I have used A/C 6x12 page protectors here and added Scenic Route label stickers. 

I store some extras at the front of the album so I can take the album and the photos to the lounge room and work on the project.  

10. Don’t feel overwhelmed by the enormity of this project. It is what you want it to be. If you skip a week that's fine. It's only one week in a year. Here is a week where I only had photos from one day so the spread was only one sided. Work with what you've got and record the memories. Enjoy the process.
Enjoy it. Add photos, leave week undone, journal, don't journal and add extra photos. It's up to you. Do it your way. Enjoy it. 

What are your methods for staying on track with Project Life or Project 365? I'd love to hear your tips.


Friday, September 14, 2012

Hitchhiker's Guide to Scrapbooking

I've been eyeing off this course on Two Peas for some time now. I had promised myself that if I FINALLY got my scraproom clean I would purchase the class as a reward to myself. Well after 8 months in the room I still hadn't got the room clean. I decided to purchase the class using my scrapbooking budget because I realised I might be waiting 20 years for the room to be clean.

I have to say I'm most impressed with the class. Of course I love Shimelle so that helps but I've already created 4 pages using only the first lesson. Imagine how many I'll complete once I've been through all the lessons. Every night this week I have completed a page. This class is really helping me get my mojo back. 


This layout is about my daughter's godfather who she calls "my Josh". We chose really well. He is such a wonderful young man and Hannah just adores him. I think it is hard to tell who loves who more. 


The stamped flower I have had in my pink embellishment box for years. I don't know why I kept it but it works well on this layout. This layout came together really easily. Thanks Shimelle.


I found this photo a little difficult to know how to match paper colours to because there is so much colour in the background and her school uniform doesn't match with the bright colours of her hat. I decided not to match the colour to the paper, obviously. I went with some themed paper and bright colours. I like how it turned out in the end.


.
I used the Stampin' Up lace punch and layered over the border strip. I like the subtle texture this gives. I've also used a lot of washi tape on my 4 layouts. This is a new technique to me. I didn't understand what all the hype was about until I got some. Now I'm in love.

 Tonight I'm creating another layout using the class. My darling husband has informed me this layout needs to be about him or our latest addition. The layout will be about my darling husband because as the 5th child I have yet to print any photos of our darling little boy. I guess that's a job for next week.

What online classes have you done? What would recommend to those who want to complete a specific project or need inspiration to get started again? Please share your links in the comments or name the class.


Friday, May 11, 2012

Shimelle's 10 on the 10th

I haven't posted in a very long time. I have had every intention to do the 10 on the 10th for the last few months but life has seemed to stop me. I have stopped me. I haven't made this blog or my scrapbooking a priority. In fact since moving back to Brisbane I have barely scrapped at all. I have lost my mojo. I don't know how to get back into the groove I once had. Here is my latest work. My work of the last 5 months. At the end are my three favourites.

1. I completed this layout last year and was waiting for my daughter to complete the journaling. That's not exactly true, considering she's not yet 6, I was actually waiting to feel inspired enough to get back into my scrapbooking. 


 2. This layout was completed mainly during a crop night with my friend. I am so glad to be able to catch up with with my friend and get some scrapbooking done. It forces me to get out of my rut but I don't manage to do anything else during the week. Oh how times have changed.


3. This layout was completed at another crop night. All but the journaling. The journaling is about how hard it is to give a baby their first foods, well for me anyway. Most of the supplies for the last 2 layouts were from the Becky Higgins Sweet Baby kits. I'll post some more details on these layouts and the Becky Higgins Sweet Baby kits soon. I promise, especially for those of you who have requested I do as much.


4. This is a Kaisercraft range which I have had since last year. I have finally made some layouts using it. It is quite a cute range and suited our visit to a large property just before we left Longreach. What an amazing place it was. The property stretched from horizon to horizon. AND the land is flat so you can imagine how far that is. Well actually I don't think you can imagine it. Until I saw it with my own eyes I wouldn't have been able to believe it either.


5. This is one of my favourites in a while too. I completed this last year at a friends surprise 40th birthday party crop. I hope someone does something like that for me. We were all given a kit and 30 mins to complete a layout. This is what I came up with. I'm pretty impressed with my efforts for 30 mins. 


6. I had these papers sitting around for ages. I didn't know what to do with them. I really liked the Basic Grey flower paper but it was too detailed and I just didn't know how to use them. After I'd had them for a while I fussy cut some of the flowers out but I still didn't know what to do with them. I think they work quite well here. I like the border punched edge too. I think it works well and you can't really tell it's been joined. I am happy with how this turned out. At least the memory is recorded.


7. Here is another one using the Kaisercraft papers. What I am actually most proud of in this layout is the way I manipulated the Technique Tuesday stamps to align with the curve of the hill on the papers. I really like how that works. 


8. Now starts my favourites. These were all completed by my daughters. Hannah aged 3 completed the following 2 pages. She selected the photos and the embellishments and told me what to write in the journaling. I'm so proud of her. 


9. These are made from the Project Life kits and bits and pieces she has found around my scrapbooking room. I'm so happy is into scrapbooking and so so happy she bugs me for the chance to complete a page. Again the words are hers. In this one I also added a note from Mum just to add a bit more detail about the significance of the photos.


10. I still love Project Life even though I haven't kept up to date with it. I am so disappointed with myself but  unfortunately LIFE has interfered with me getting anything done.


Here are my 10. What are yours? How do you go about getting your mojo back? I need as much help as I can get. 10 layouts in 5 months is not very good. Help me get my mojo back.