There seems to be a renewed interest in Project Life. Maybe it never waned, maybe the interest has peaked because of the new products. I am interested in the school years mini kits but can't seem to find any information about when they'll be released. For now I'm plodding along with my Project Life 2012 albums. Up until yesterday I was very behind. To be honest with you I'm not entirely caught up. I still have a few photos to print and a few dates to find out for photos but essentially everything is completed.
I decided to include my top 10 hints for making this a do-able project.
Tips for Project Life
1. Be prepared. Be super prepared. Have an idea of what you
want to achieve with this project then set your system up for that project. You
might want to do a spread a month or just of special family events. You may go
the weekly method like I have. Whatever system you decide on, set it up so it works for you. Set your photo organisation system and your journaling system up so it works for you. Be prepared with supplies if you are adding to the core kit or just use what comes out of the box but be prepared so it doesn't become a huge task.
2. If you are going the monthly method you may want
to stamp a few journaling cards with just the month and the year on them so
when something important or memorable happens that month you can simply write
on the card and set it aside until the end of the month. Last year I did 7 or more
journaling cards a week so I pre-stamped my cards with the date of every day for a few months in advance so I just pick up the
card at the end of the night and write on it. This year I haven't gone with that method and I feel my journaling has been let down by it a bit. I haven't kept up with my journaling and have often only journalled once the photos have been printed. Often my journaling doesn’t match
the photo and I’m ok with that. I have written journaling cards with the meals
we’ve eaten that day and the times certain events have occurred. Sometimes the photos say enough and I want to include other parts of our lives. What can you say about a cute kid?
3. Be a little relaxed about the project. Its purpose is to record memories and be a simple alternative to traditional scrapbooking. Find strategies which make it less stressful. I’m also ok
with not having a photo a day. In the past I have included journaling every day but some weeks
there might be 4 photos from one day and I forget to take a photo for the next
few days. So work out the system that works best for you. Work out if you are
ok with journaling that doesn’t match the photos. Work out if you will stick to
a photo a day or whether my approach will be something you’ll be able to live
with.
4. I did just mention journaling but I wanted to point out my
experience from 2010 when I made my own kit. The kit was made to type the
journaling and print it on the computer. This didn’t really work for me.
Although I am quite skilled at printing my journaling onto tags and the like
for my scrapbooking pages I didn’t end up printing out my journaling until I’d
had heaps of journaling cards completed. I also found that at the end of the
day the last thing I wanted to do was sit down in front of the computer and
write my snippet of journaling. Most of you know I don’t like my hand writing
so I was a little nervous about having a book full of my handwriting for all to
see. Now I'm ok with that. I don't mind people seeing my spelling mistakes and my horrible handwriting. I just want the memories recorded. So if you know you can sit down at the computer to do the journaling go that route but if you think that having a stack of cards handy will mean you are more likely to record the story use your handwriting. I find it easier to dedicate 5 mins a day to
writing my journaling directly onto the cards than 15-20 mins at the end of the
week. However you do it work on a system that will work for you. Have them in
your handbag or in your diary so they are on hand.
 |
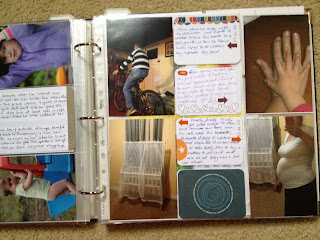
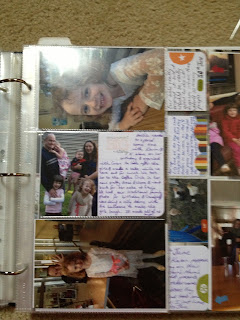
| Here there is a lot to say. Lots of writing. Almost a card for every photo. |
 |
| Another busy week with added inserts. |
5. Download regularly. Last year my system was to download the photos every Friday. They were then labelled and stored appropriately. This year I have not allocated time every Friday to do this and have fallen behind in photo downloads. This is something you want to avoid. Keep your photos up-to-date otherwise sorting and labeling them just becomes too big a task.
6. Storing your photos. Find a system that works for you. I label them
with date (year, month, date) and title and store them in the month folder and copy the photos I
want for P/L into the P/L folder which
then has sub-folders with the month. So my P/L photos are stored in 2 places;
in the general photos section under year then month and also in the P/L folder.
I do it like this so I don’t have to search for the photo I want amongst all
the other photos taken that month. I don’t print at home because I can’t
justify the expense of a home printer which is of good enough quality when I
can get prints from Harvey Normans for 9c.
This is a list of photos I need to print so I'll just go to the relevant folder in the Project Life album and print them out. Very easy to find.
7. Print photos regularly, at least once a month. The longer you leave it the bigger the task becomes. I find that by storing them in the correct folders makes it easy for me to know where I am up to. My aim would be to print every week but somehow life gets in the way and I can't get to the shop to print.
8. Keep it simple. I very rarely add other embellishments. A bit of washi tape here, a jewel there, and only a very few times special letter titles. I mainly use the kit by Becky Higgins.
This is a rare example of adding title letter stickers.
9. Cut page protectors to suit your purpose or don't be afraid if you have to stick a portrait shot in the landscape pocket. Remember it's a memory album. Will your kids or great nieces care in 30 years time? Will you? Use what page protectors you have to make it work. I frequently use American Crafts 6x12 divided page protectors to add extra photos and I've even cut a few.
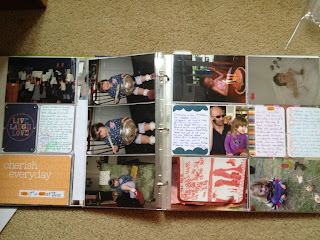
I have used A/C 6x12 page protectors here and added Scenic Route label stickers.
I store some extras at the front of the album so I can take the album and the photos to the lounge room and work on the project.
10. Don’t feel overwhelmed by the enormity of this project. It
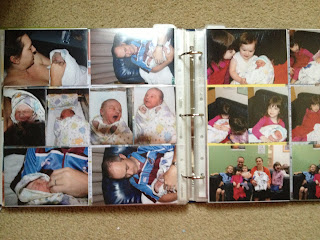
is what you want it to be. If you skip a week that's fine. It's only one week in a year. Here is a week where I only had photos from one day so the spread was only one sided. Work with what you've got and record the memories. Enjoy the process.
 |
| Enjoy it. Add photos, leave week undone, journal, don't journal and add extra photos. It's up to you. Do it your way. Enjoy it. |
What are your methods for staying on track with Project Life or Project 365? I'd love to hear your tips.


awsome i was wondering if you saw the neww book that micheal are showcasing this week.. they seem ok .. i'm looking this weekend ti cehck one out .. awesome work.. thanks for sharing..
ReplyDeleteI haven't heard of the book as I am in Australia and we, unfortunately, don't have Micheals. I would love to hear what they are about. Thanks for sharing.
DeleteYour method seems so organied too. There have been a few project live great ideas latley!
ReplyDeleteThis is an awesome post as project life scares me. I'm really thinking of trying in january though. I'm a new follower from 2peas.
ReplyDeleteI started and then stopped and I think I might have to catch up just a little too much...but I have the kit and pages so I think maybe next year - to start a fresh :) Thanks for the tips.
ReplyDeleteThanks for the tips Amity! I've been thinking about going the Project Life route as I try to pick up scrapbooking again. I've enjoyed your blog. Got the link from the post about blogs on 2peas.
ReplyDelete